Using Module Repositories
This video will show you how to create a code space after forking a repo using the green button, but you can also use the orange button to both fork and create the code space. Try both ways!
In the LEAGUE’s online Java curriculum, the lessons are organized into levels, modules, lessons and assignments. Every level has a whole website. For instance, here is the website for Level 0. Inside the level are modules, modules are named with a number at the end, like “Module 0”, and they will have links with a large bold title on the left side of the page. Click on that link to get the introduction to the module. For instance, here the link to Level0, Module 0
Codespace, Fork and View Links
On the root model pages in the Curriculum, ( for instance, Level0, Module 0 ) page you will see three important buttons:
The  button. This button will fork the repository into your own github workspace so you can
work on it, and will also create a new virtual computer with an editor for you to work on it.
The  buttons will let you fork the module repository. Forking a repository will
make a copy of it in your Github account so you can work on it. in your own repository.
The  buttons will take you to the module repository, so you can see all of the code
at once. This repository will be the LEAGUE’S repository, not yours, so you
can’t change it, and won’t see any of your changes. Visit your account to see
your version of the repository.
If you visit one of the assignment pages, like this one
you will see a  link. This link will take you into the Module repositopry, to the specific
directory that has the assignment you are working on.
Fork a Module
Let’s try it. Visit this page:
https://league-java.github.io/Level0/lessons/Module0/
On that page, click on the  button.
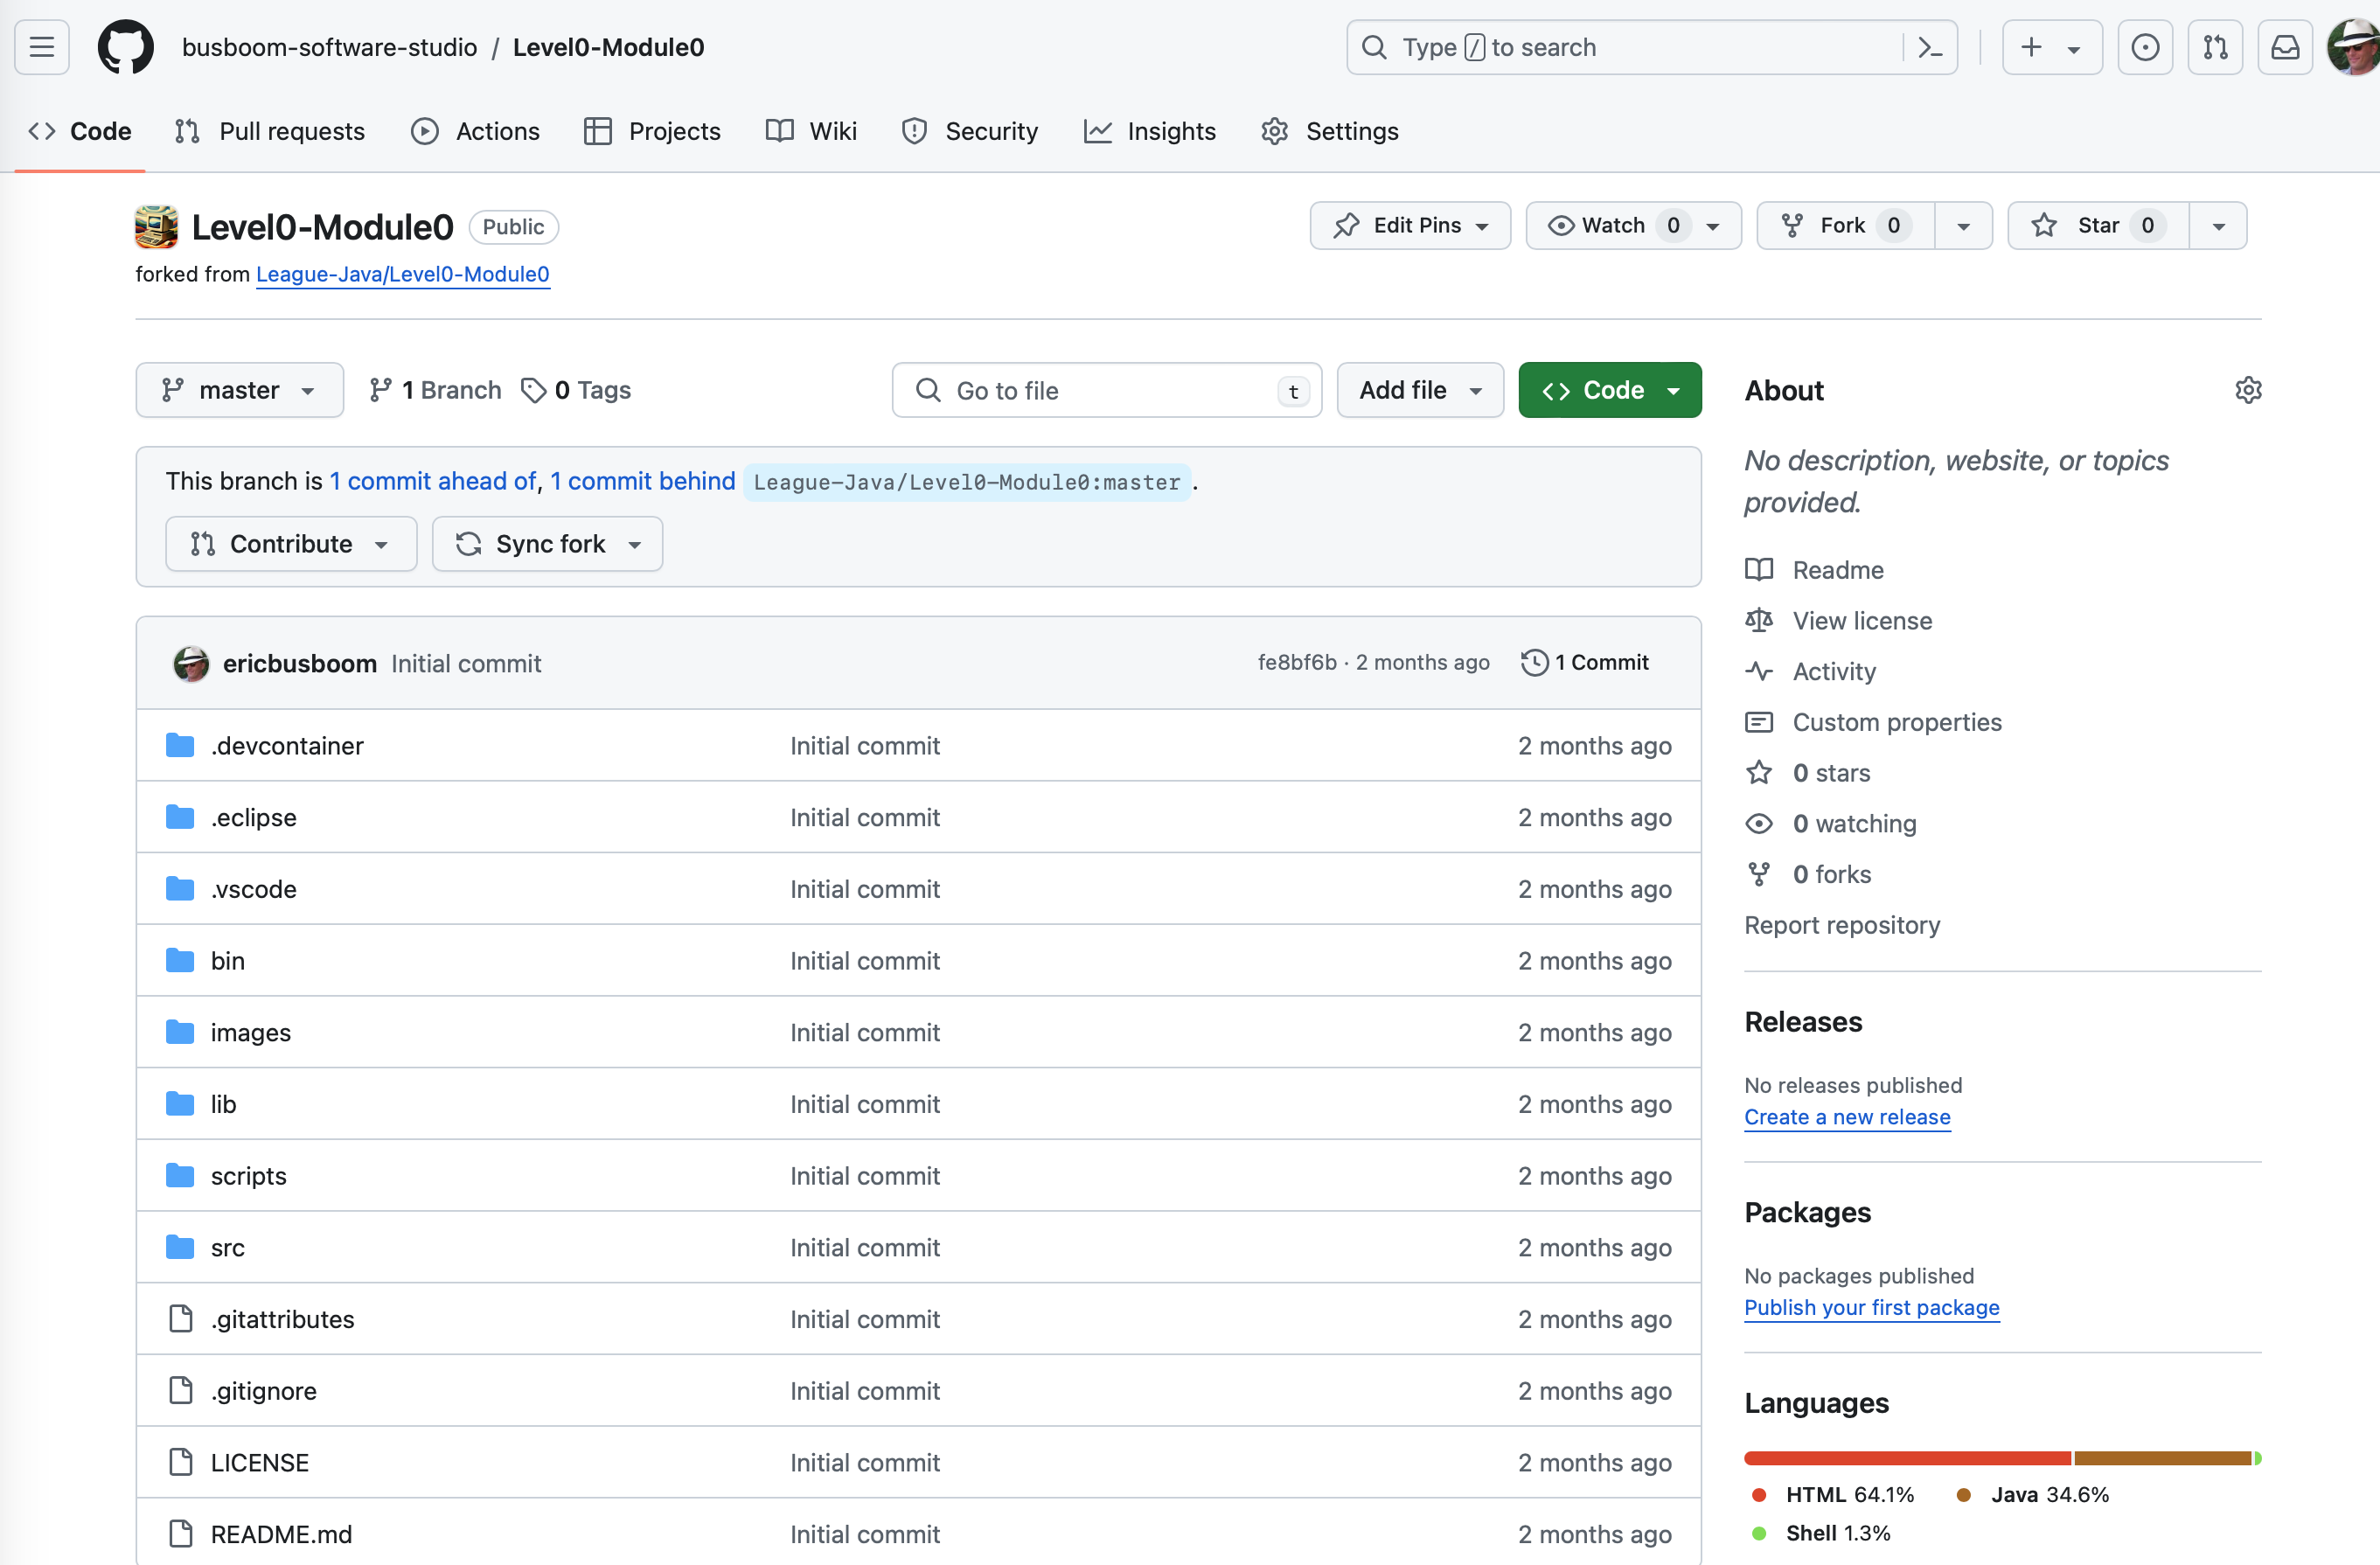
Then click on the green “Create a Fork” button. When the page finishes loading, you will get a page that looks like this:
Create a Codespace
There are two ways to start working on this module. One is to copy the repository to your local comptuter, a process called “cloning”. The much simpler way is to run the development environment on the web, using a GitHub Codespace.
On the repository page, click on the green “<> Code” button, after the window pops up, click on the “Codespaces” tab. It will look like this:
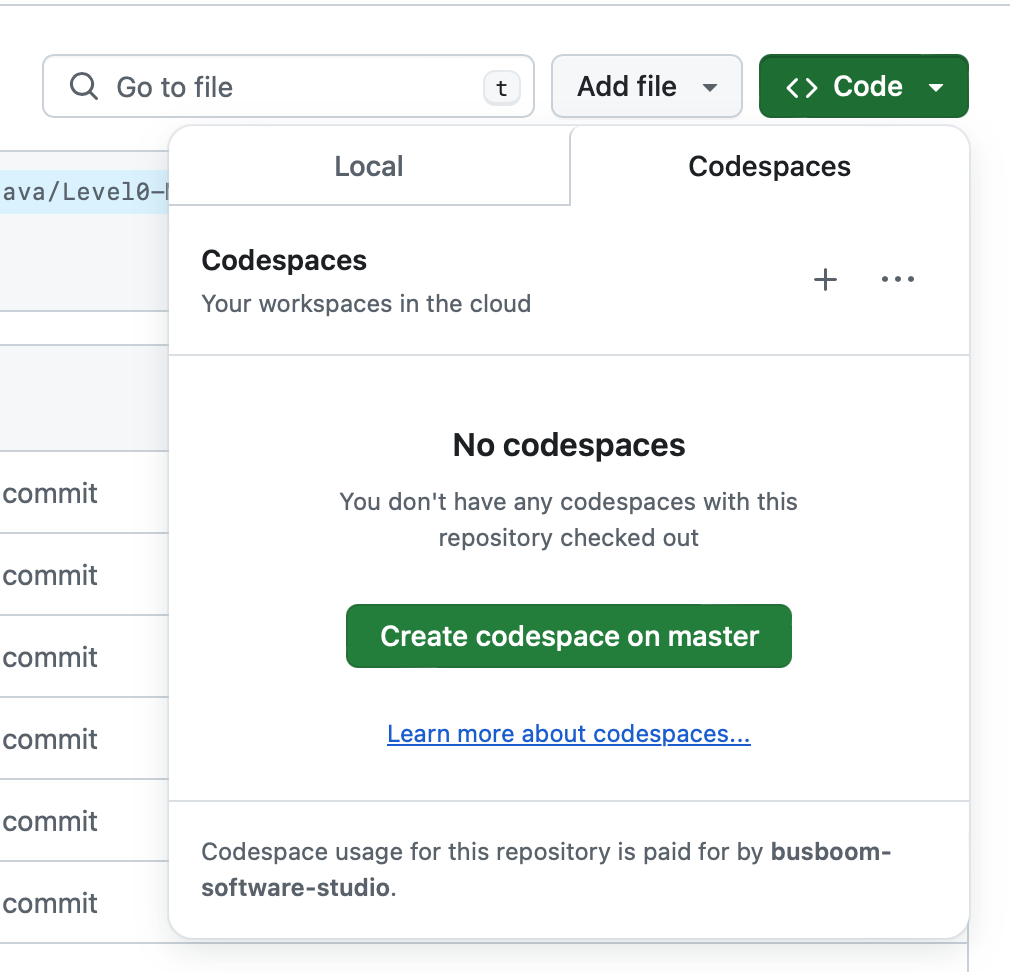
Click on the “Create codespace on master” button. A new tab or window will open, and it will read that it is “Setting up your codespace”. This may take a few minutes. When it is done, you will have a Visual Studio Code window, which will look like this:

Fork and Create Codespace in one step
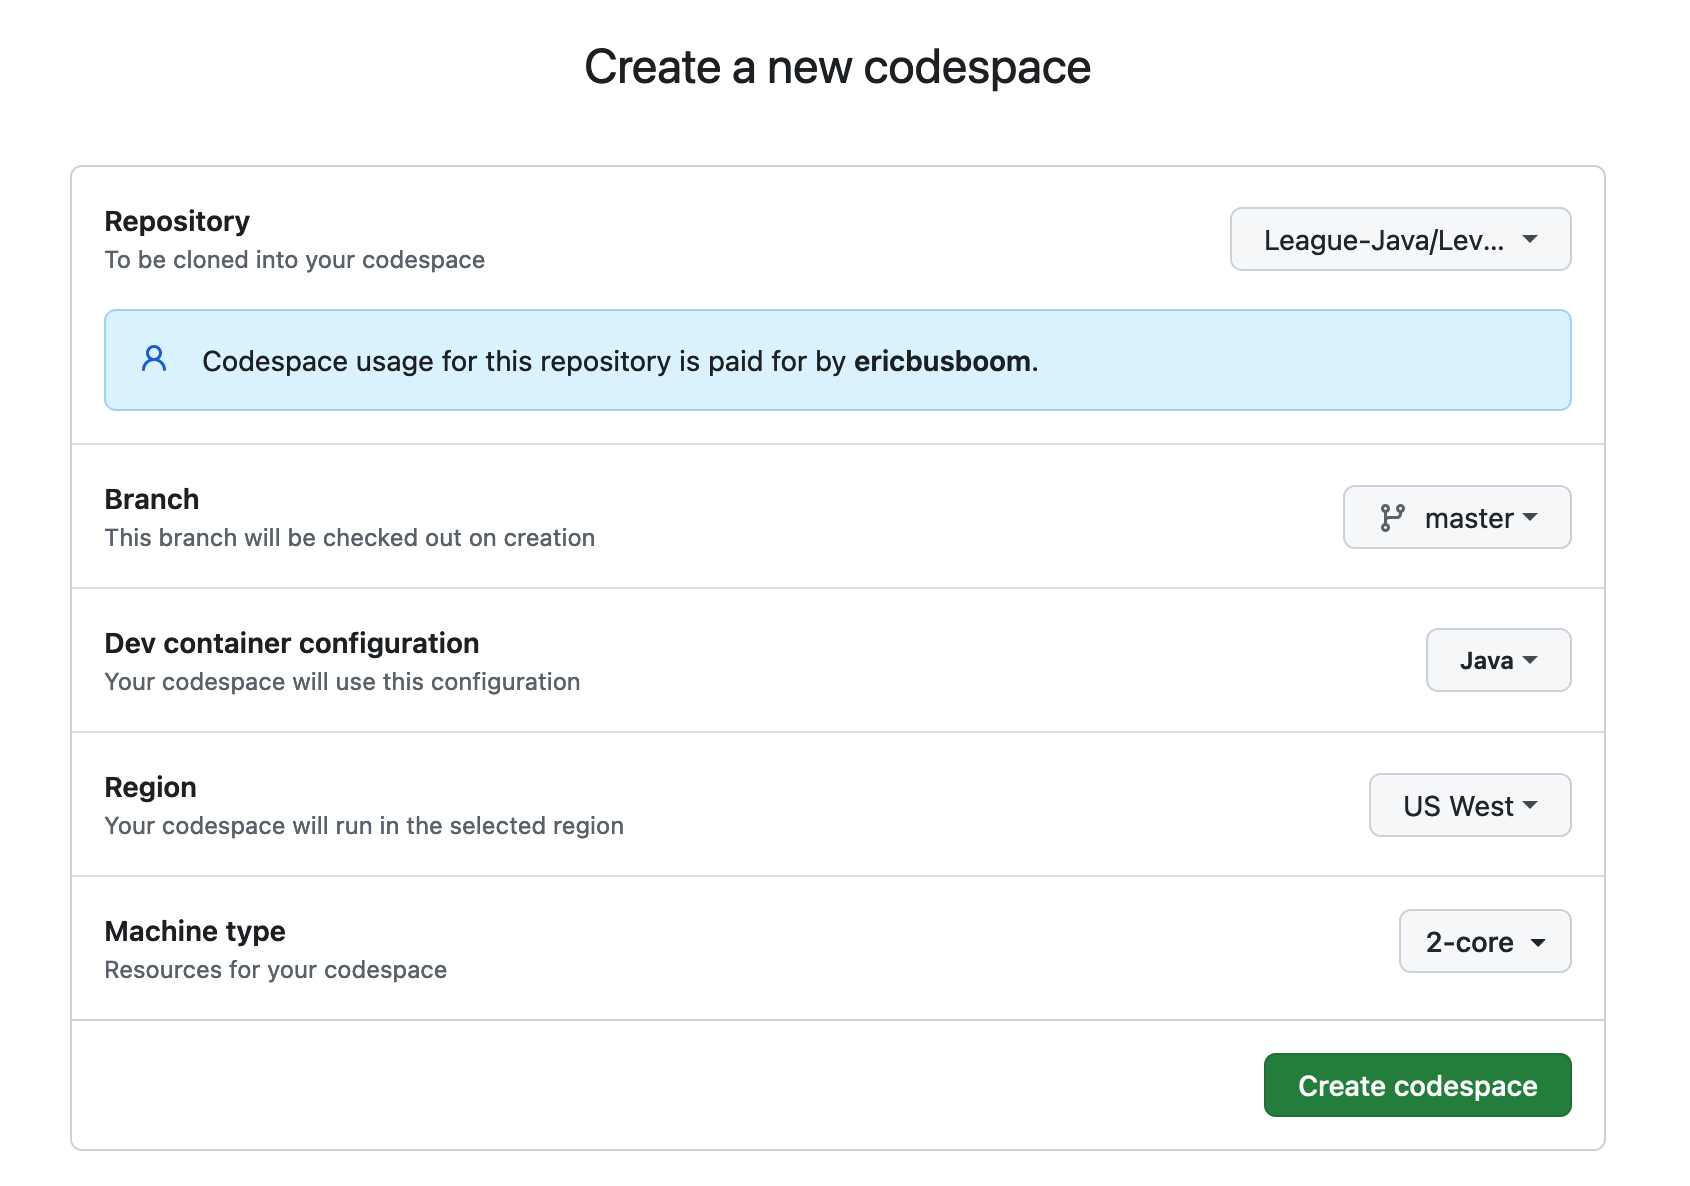
You can fork and create a codespace in one step with the  button.
Press that button and you will get this screen to configure a new codespace built from the
repo:
Look at some code
The codespace will take a few minutes to finish building, and when it is done, you will have a Visual Studio Code window. In the left menu, click on this icon:

Navigate to src/_01_demo/ and click on RobotDemo.java to view it.
Open a screen
The VSCode editor you are using is running on a remote server, which does not have a screen. So we have to use a virtual screen, provided by a program called VNC. This screen will appear in a pane in VSCode or browser window. Here is how you open this window.
In the bottom pane of the VSCode window, click on the “PORTS” tab.

Hover over the “Forwarded Address” for port 6080. You will see a small icon that looks like a split box with a magnifying lens Click on it. This will open a new browser window with a “noVNC” logo.

Click on “Connect”, then enter the passwod: “code4life”
Now you have a virtual screen running. When your program writes to the screen, it will show up in this window.
If instead of clicking on the split-box icon you instead click on the world icon, you will get a seperate window or brrowser tab for your virtual screen. This might work better if you have a small screen.
Run the program
To run a program, click on the “Run Debug” icon in the left side menu”

At the top of the screen you will see the “RUN AND DEBUG” menu.

Click on the down arrow to open the menu.
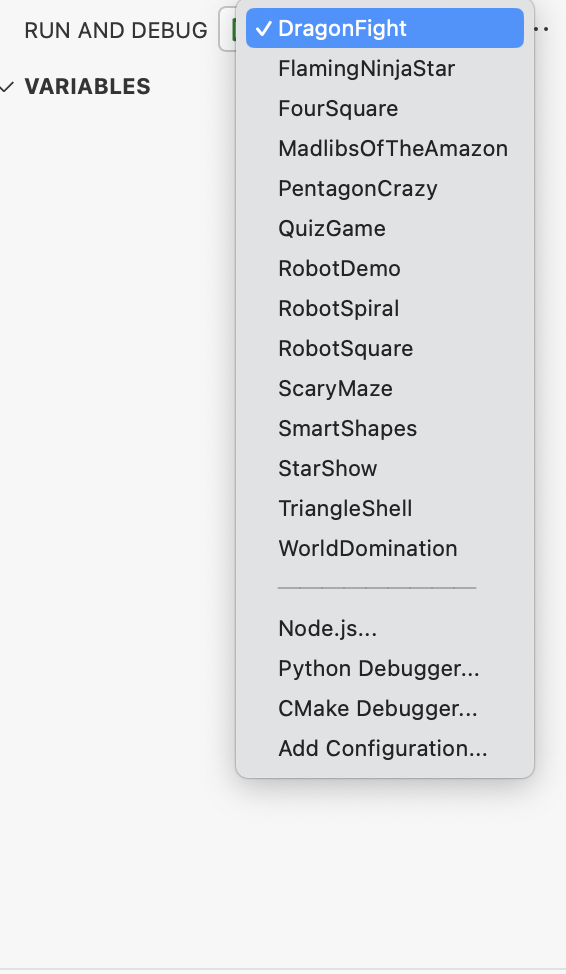
The select “RobotDemo”, the program that we are viewing the source code for. Then click on the green run arrow.
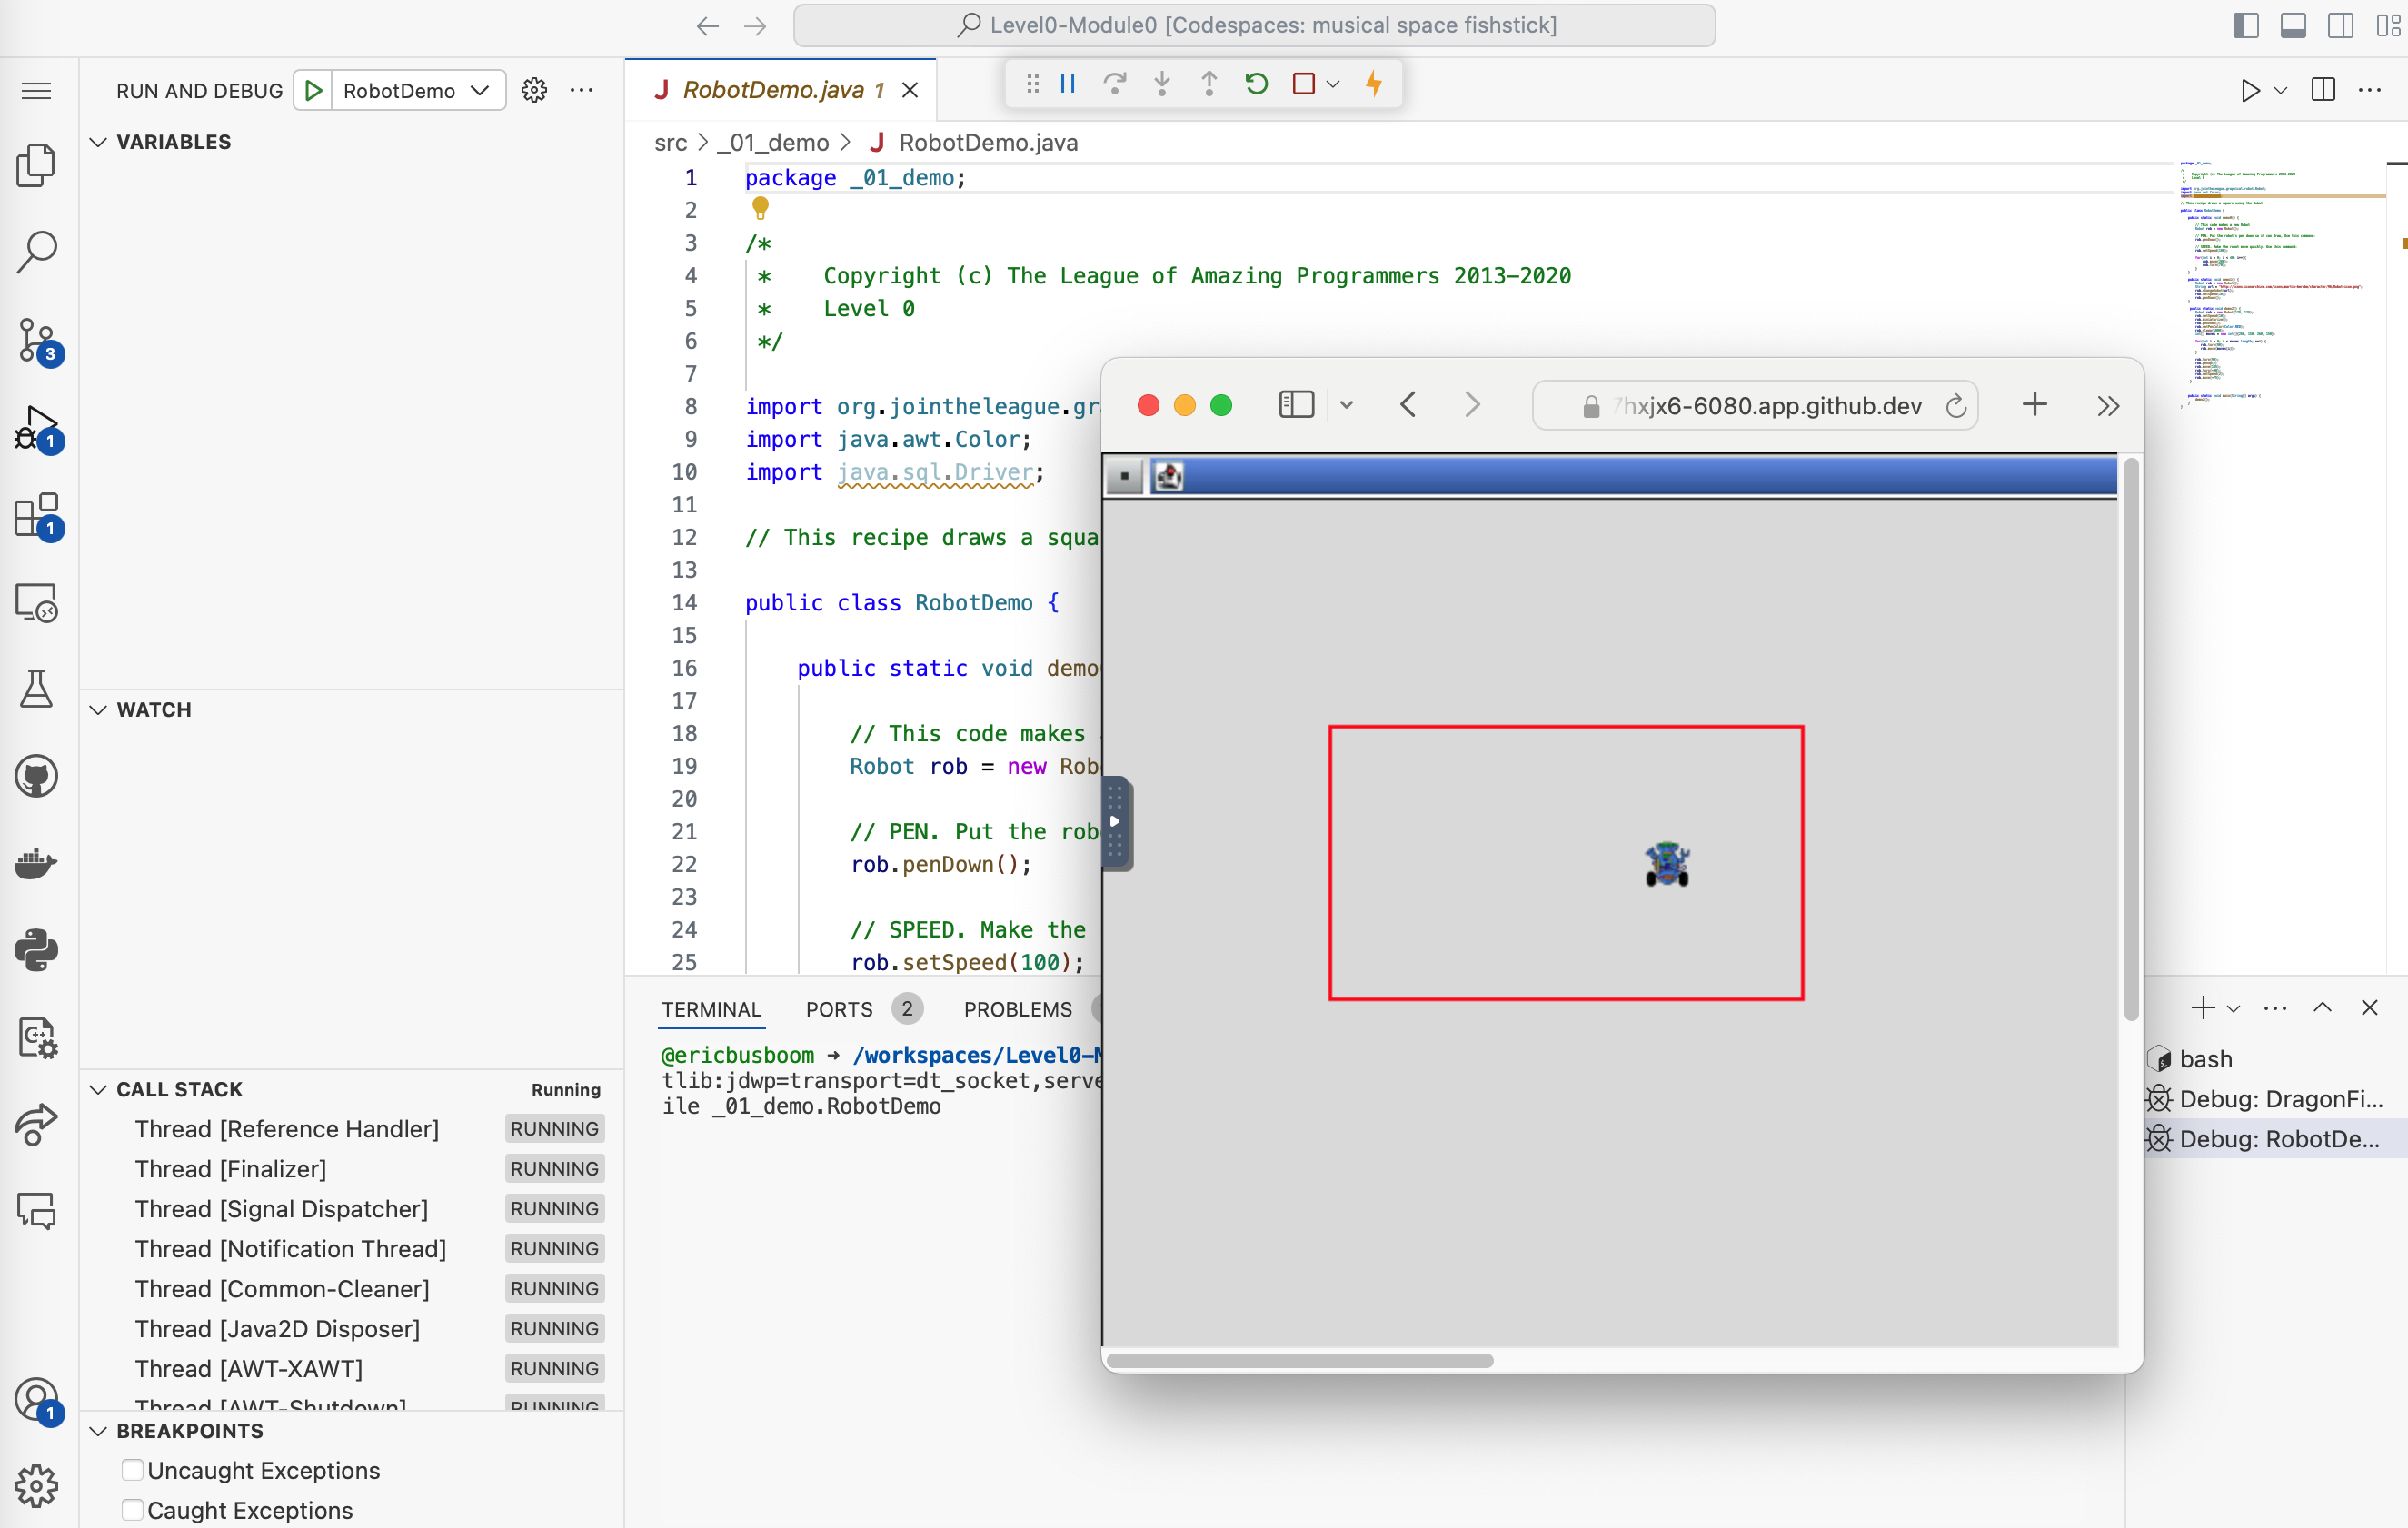
Look in the virtual window you opened earlier. You should see a robot drawing a red square.
Find the codespace again
If you close the window with your codespace in it, you will want to find it
again later. Go back to the repository in Github and click on the green Code
button as before, then select the Codespaces tab. However this time you
will see something like this:
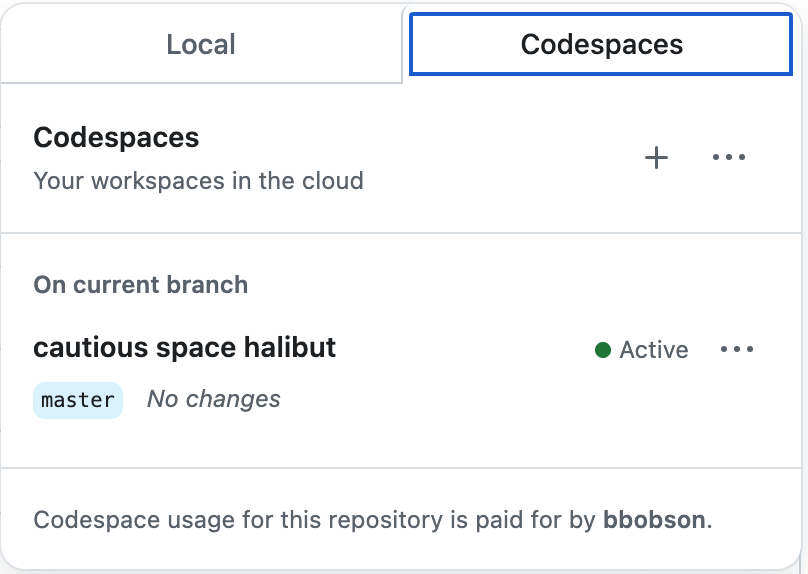
This is a repository with an active codespaces with crazy name, ‘cautioous space halibut’. Click on one of the crazy names to open your code space, or click on the ‘…’ for other options, such as deleting it.