Python on Codespaces
The League’s Python curriculum is built using two important modern professional development tools: Visual Studio Code and Github Codespaces. Github is a site where you can store your code, and Codespaces is a way to run your code in the cloud. Codespaces will run your programs and also give you a programming editor, so you can write and run your code all in one place.
1: Get a Github Account
Github is a professional source code repository, and almost everything you do at the League will involve Github, so let’s start with creating a Github account.
If you already have an account, sign into it now.
2: Tell Us Your Github Name
Let us know your Github name so we can track your progress by filling out and submitting this form:
If you aren’t a League student you can skip it, but we’d still love to know who you are.
3: Getting your lessons
The first thing you need to do is to get the lessons from Github. You should have been given a link to a Github repository, which is a place where code is stored. FOr example, here is the link to the Python Apprentice lessons, which you can use as an example for the rest of these instuctions.
https://github.com/league-curriculum/Python-Apprentice
Click this button to “fork” the source code. ‘Forking; is a way to make a copy of the source code repository in your own Github account, but with a link back to our original, so you can get updates.
 Fork Repository
Then, on the next page, click on the
 button.
This will copy the whole course into your Github account.
button.
This will copy the whole course into your Github account.
When the fork is finished, you can start your web based programming editor.
( If you are more currious, you can visit the course repository, and then fork from there. )
4: Start the Codespace
Enable progress reporting
After the code is forked, you wil see the web page for the course repository,
named ‘Python-Apprentice’, in your Github account. Click on the  menu item, then click on this big green button:

This will allow your repo to tell The League when you check in code ( using a GIthub action in the .github directory ) , so we can track your progress. If you aren’t a League student, you can skip it.
Now click on the  menu item to go back to the main page.
Create a new Codespace
Next, on the main repository page, look for the  button. Click on the button, and after the window pops up, click on the “Codespaces” tab. It will look like this:
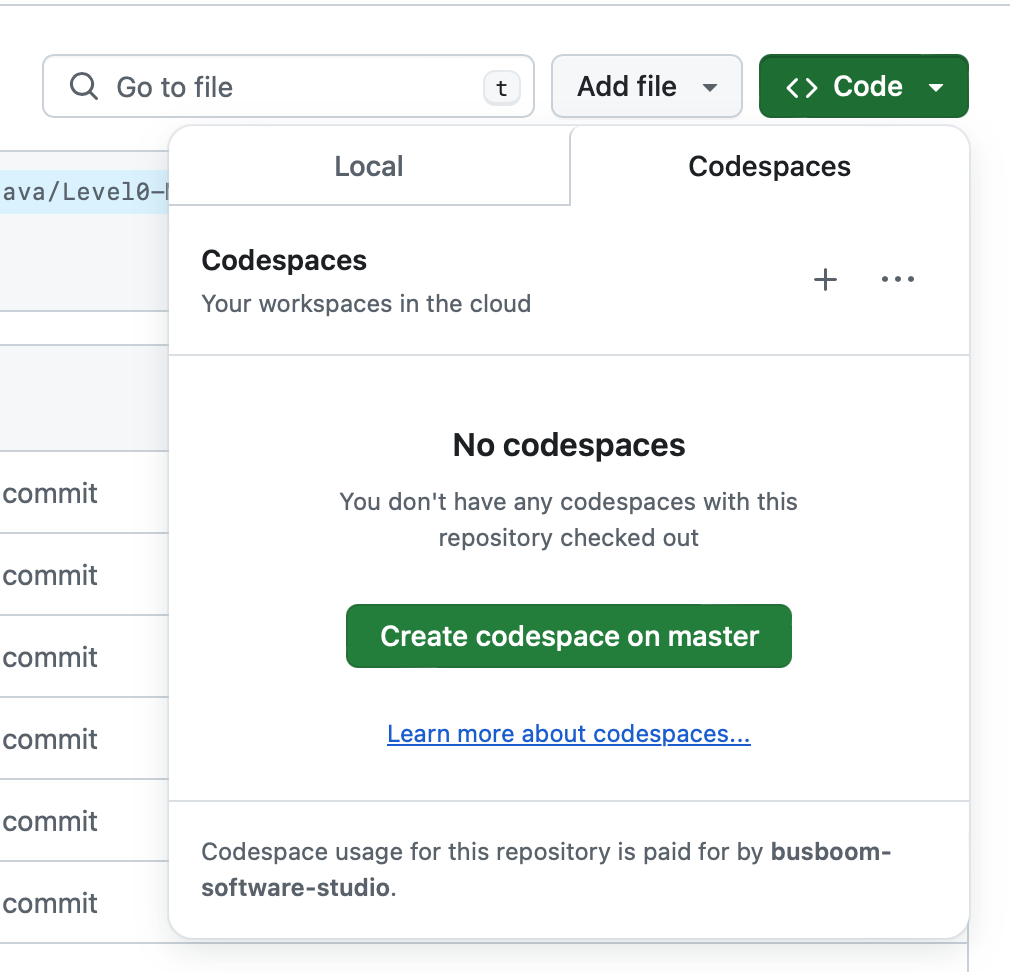
Click on the “Create codespace on master” button. A new tab or window will open, and it will read that it is “Setting up your codespace”. This may take a few minutes. When it is done, you will have a Visual Studio Code window, which will look something like this:
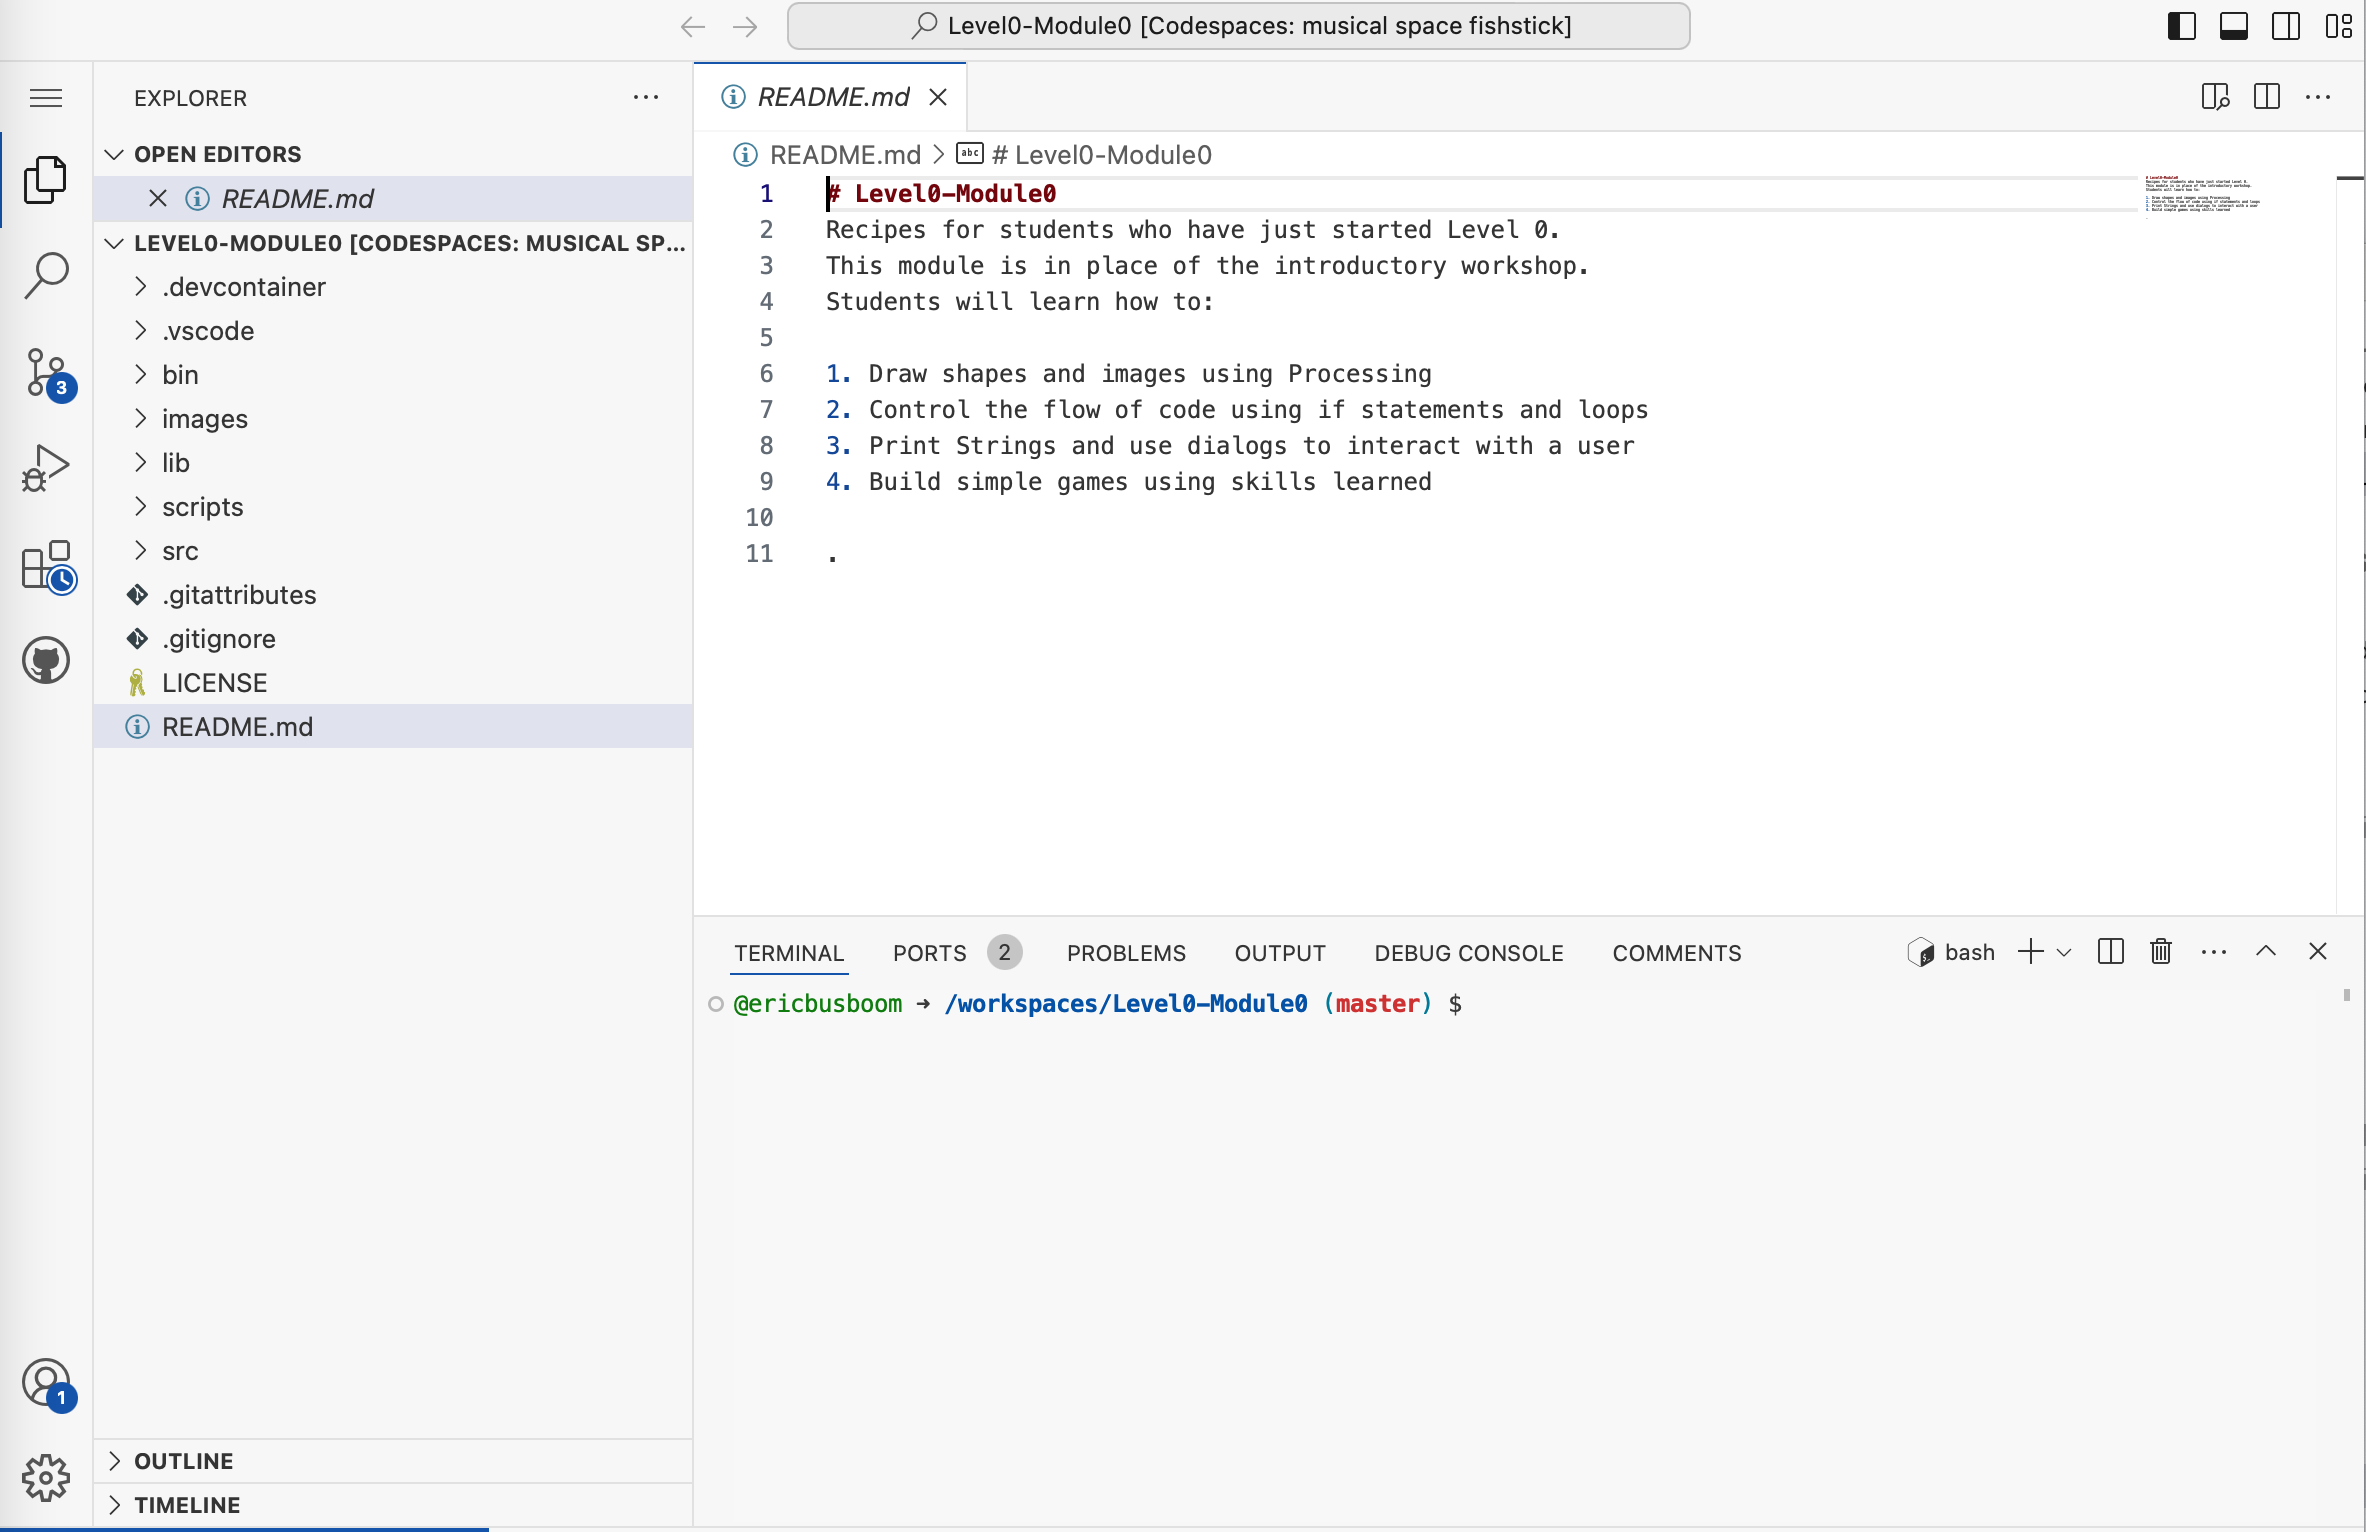
You are ready to start your lessons. You editor window should be displaying the
README file, and at the bottom of that file it will tell you which lesson to
start with, lessons/lessons/00_Turtles/01_Get_Started.ipynb
5: Open a Virtual Screen on the Web
If you started your editor as a Codespace on Github, that is, you clicked
on a button like  to start your editor, then you need to follow these steps to open a virtual
screen. Your Codespace is running your code in a data center far away, and it
doesn’t have a screen, so if you want to see your program output, you have to
create a virtual screen.
to start your editor, then you need to follow these steps to open a virtual
screen. Your Codespace is running your code in a data center far away, and it
doesn’t have a screen, so if you want to see your program output, you have to
create a virtual screen.
In the bottom pane of the VSCode window, click on the “PORTS” tab. ( If you don’t see a “PORTS” tab, you probably can skip this step. )

Hover over the “Forwarded Address” for port 6080. You will see a small icon
that looks like  . Click on it. This will
open a new browser window with a “noVNC” logo.
. Click on it. This will
open a new browser window with a “noVNC” logo.
You might need to drag the browser window to the right side of the screen. Your screen should look something like:
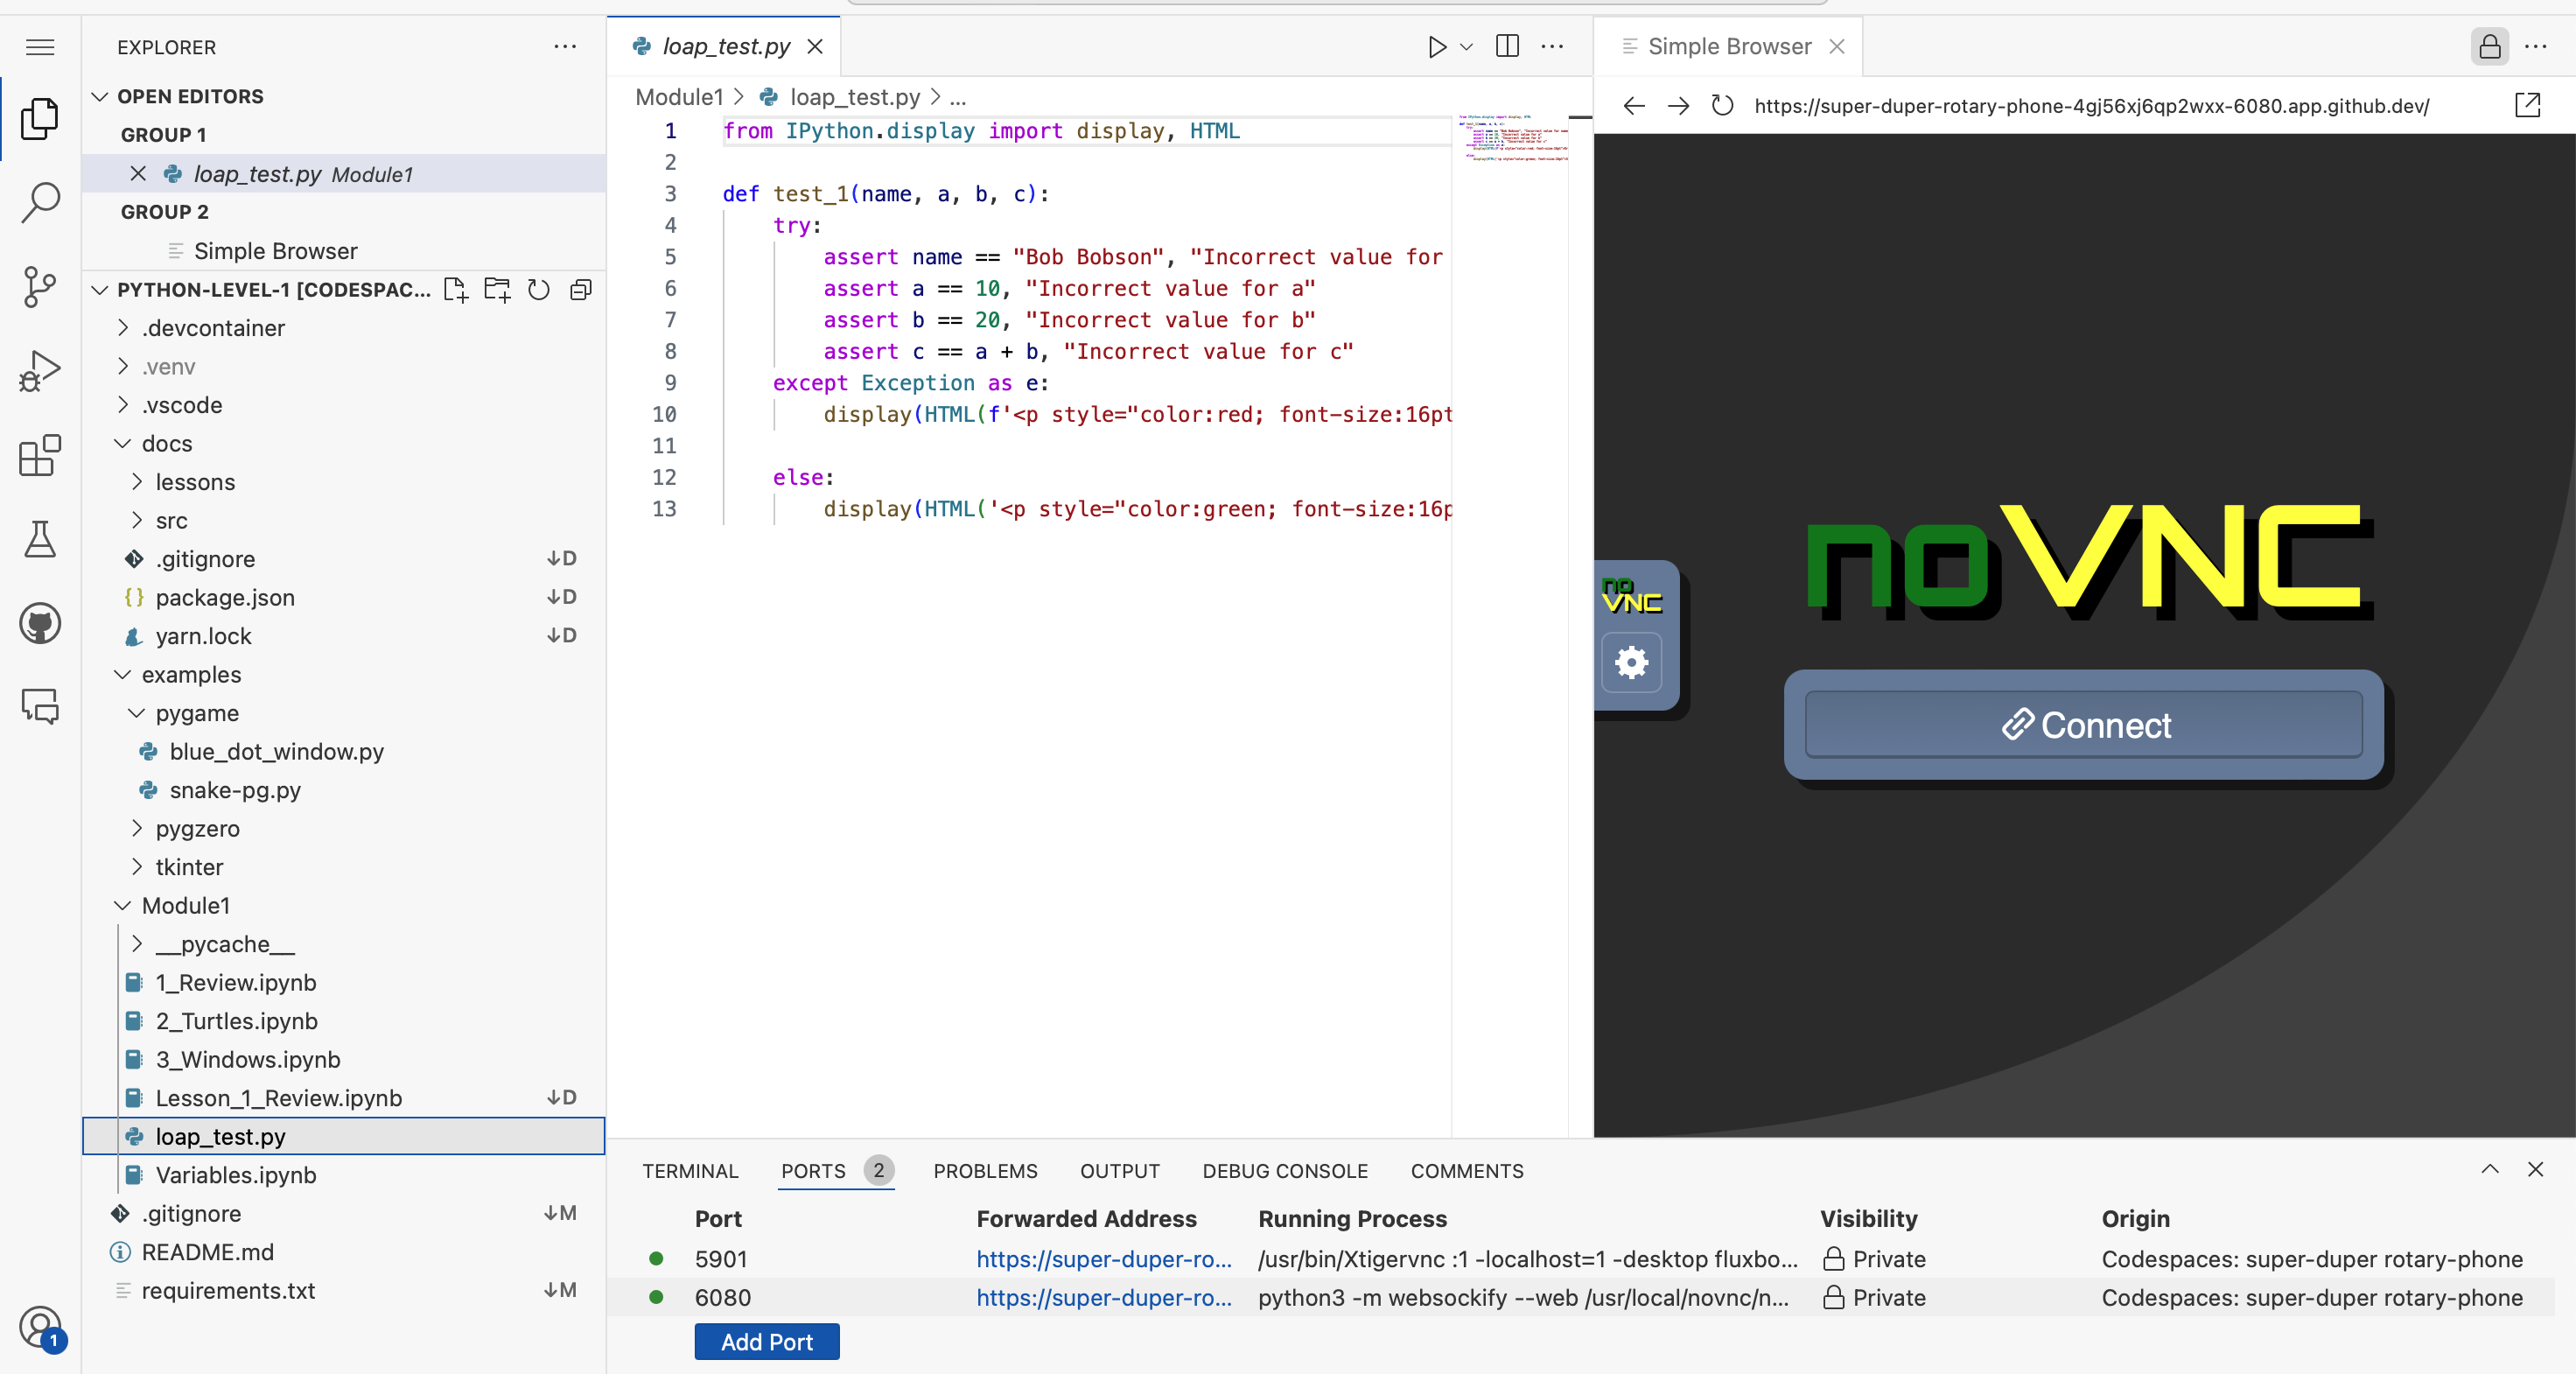
Click on “Connect”. If it asks for a password, enter the passwod: “code4life”
Troubleshooting: if the “Simple Browser” pane takes up the whole editor area, try grabing the “Simple Browser” tab and drag it to the right side of the window; there should be a pale-blue shadow that shows where the pane will go. If it looks like the browser window is not loading, try clicking the circular reload icon at the top of the window.
Now you have a virtual screen running. When your program writes to the screen, it will show up in this window.
6: Running Programs
The files that end in .py are Python programs, and the type of program you
will run most often. Now let’s run a Python program. For the Python Apprentice
curriculum, which is in the file named lessons/00_Turtles/02_Meet_Tina.py.
There are a few ways to do this:
Use the ▶️ button
Click on the file name to open the file
Look in the upper right for these icons:
 click on the ▶️ run button to run the program.
Click on the window to close it.
Hit the F5 Key
You can also run the program by hitting the F5 key. On a Mac, you will have to hold down the fn key and then hit F5. This is a bit different than using the run button, because F5 will open the debugger.
The first time you hit F5, look at the top of the IDE window. YOu shoudl see a selection window that reads “Select Debugger”. Select the first option, “Python Debugger”. Then, on the next window, select “Python File. Debug currently active Python file”. After that, you will see the debug bar:

We will learn all of the features for the debugger later, but for now you just need to know that you press the red square to exit your program, and the green circle to re-run it.
You can’t run a program again until you end the currently running program. If
you see a turtle window open, then you should either click on the window to
close it ( if the program ends with turtle.exitonclick() or click on the X in
the upper right of the turtle window. )
Or, if you are using the debugger, click the red square in the debugger bar.